The Inspiration for the dress
I was inspired recently by a student of mine. She attended one of the dressmaking workshops with me and having enjoyed the experience she decided to write a blog about how she arrived with a pattern and length of fabric and left with a dress! So I thought I would give this blog idea a go!!! So here goes……………………………
Having recently finished making a wedding dress for Tracy whose wedding is in 29 days time (sorry can’t post a picture of the dress just yet!) I thought I had better get round to making something for myself when attending the nuptials. Well, you know what its like girls, I simply just have nothing to wear………………………. but I do have a pair of shoes I purchased some time ago that I have not worn, so it got me to thinking!!!!!
Why not make an outfit to go with the shoes?

The Ingredients
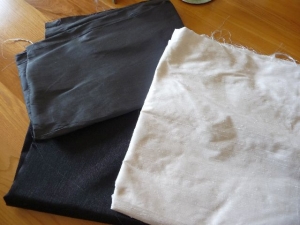
So I popped along to my local fabric store and purchased 3 lengths of silk dupion in white, black & grey and a vogue pattern V1162. I then set about cutting out the pattern pieces. but as the silk is quite lightweight I have decided to underline the dress with both silk organza and a cotton lawn, this will add body and weight to the garment as well as help to disguise the seam allowances from the right side. The main body of the dress will be in white with the grey and black as accents, but I haven’t quite decided yet how this will take shape. I will see how the dress evolves and try out different ideas as it is constructed. I will also be lining the dress with a fine silk habotai.

I Begin………
I have cut out the the main pattern pieces in the silk dupion along with the under linings in the silk organza and cotton lawn. I then basted the three layers together and tailor tacked where necessary.
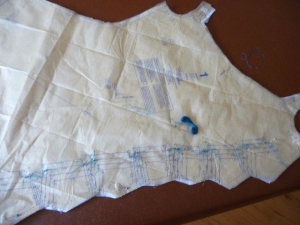

Continuing with dress – I have now pinned, tacked and stitched the tucks on the front piece into place. I then put together the back pieces and inserted a concealed zip down the centre back. I much prefer to use concealed zips whenever possible as I think they give a nicer finish. The dress was then tried on and minor adjustments made to the fit, this is where I enlisted the help of my Man! It is not always easy to do your own fitting so if you can get somebody to help with this the better, they can also see round the back – he was a great help!

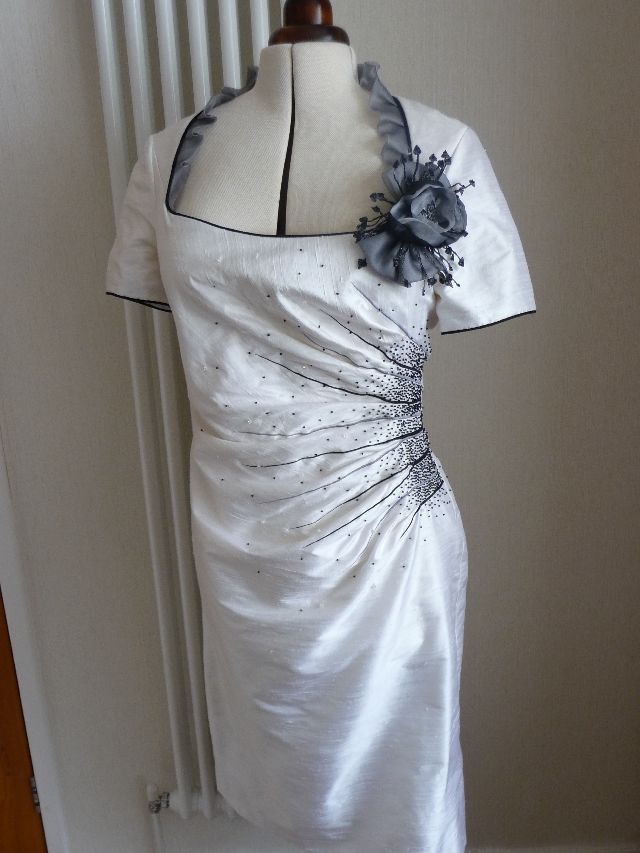
Once I was happy with the fit I then unpicked the 2 side seams so that I could to do some embroidery on the front. I have this idea of using the shape the tucks produce to create a sort of ‘sun-ray’ effect with some satin stitching. First of all practised my idea on a piece of scrap fabric until I was happy with the result before proceeding with the stitching on the dress front.

It was a “good idea”
Once the embroidered ‘sun-ray’ was in place I thought it might be a good idea to add a few beads around the stitching. I hand stitched a few black seed beads along the lines of stitching and added a few swarovski beads to give it a bit of ‘bling’. The beading took me an astonishing 11 hours to complete, sometimes I wonder why I have these ‘good’ ideas, I think I have bead blindness now!

The Ruffles
Next to takle is the ruffles. Cutting the strips on the bias, I combined both a grey ruffle and a black one layering them together, and with a lot of fiddling attached the ruffles across the back neckline, around the shoulder yokes, and around the back armscye ceasing at the side seam .

After several more fittings I reduced the shoulder seam at the top of the arm and tapered an adjustment down the front and back of the armscye, I also nipped in the back and side seams to get a perfect fit.
The next thing to tackle is the sleeves!
I have now spent several hours over the last couple of days making the bias ruffles for the sleeves, black ruffles on top of the grey fabric, and hand stitching them into place before adding the sleeves to the dress. I stitched the ruffles to the sleeve pieces in a spiral starting from the centre outwards, occasionally putting in a few swirls and bends to create something resembling a rose pattern. The photo doesn’t really do it justice as they did come up quite nice!

With my dress on the body form, I offered up the sleeves to the dress and pinned them into place so that I could get an overall look of the end result before proceeding with machine stitching them into place…………………………
But to my great disappointment I didn’t like the look! The black and grey sleeves along with the grey yoke and neck ruffles together made the dress look top heavy and the shoulders broad, it was a little reminiscent of the 80’s look with the big shoulder pads and not the sort of look I wanted to go to wedding in. A little re-thinking is in order now I think!!!
The Re-think!
After spending sometime re-thinking what to do with the dress I finally came up with a plan, so I set to and un-stitched the front yoke and ruffles from the dress. I replaced the grey yokes with white ones and also re-made the sleeves in white, but this time I did not add the ruffles. I removed the piping I originally put just on the lower front neckline and replaced it with piping around the complete neckline. I reviewed what to do with the ruffles as I did like the previous look with them around the neckline, so with the dress on the body form I played around with different fabrics until I came up with what I thought would work. I made the new neckline ruffles this time in a grey silk organza graduating the depth from the lower side neck edge to the centre back. I then added piping to the lower sleeve hem, now I was starting to feel happier about the dress!!

I tried on the dress once again to make sure of the fit and decided on the hem length. I cut away 2″ from the hem and used some of the habotai to make a bias strip to bind the hem. The bias strip was machined to the hem and the hem and back vent hand stitched into place. Having underlined the dress this meant that I cold stitch the hem without any visible stitches showing through on the right side! A bonus.

The Lining
Now happy I decided to start constructing the lining, the bodice top I cut from the cotton lawn and the lower pieces I cut from the silk habatai, stitched the lining pieces together and attached it to the dress machine stitching around the neckline. I then hand stitched the rest of the lining into place along the zip opening and the sleeve hems. I checked the length yet again, I am always checking and re-checking, before turning up the hem on the lining and ‘voila’ the dress is almost complete!!
The Finished Dress
Whilst I was playing around with the corsage that I envisioned, Tracy unknown to me was doing the same thing, but as she is far better at free-motion machine embroidery than I she made came up with something much better. She combined the embroidery with black & grey silk organza to produce a ‘rose’ and added some swarovski in the centre, the effect is quite stunning!!
So, where to place it on the dress? My ideas thus far was to place it on the side of the dress where I have stitched the sun-ray embroidery and beading. I attached 2 press studs to the back of the corsage and its 2 counterparts on the dress and I must say that it looked rather good. So I tried the dress on yet again so that I could get an overall look of what it looked like on me, however when I looked in the mirror I thought the beautiful corsage looked a little lost on the side so played around yet again with its position and decided to move it to the neckline. I removed the studs from the side and re-stitched them into place in there new position. I then had to set to and fill in the gap on the side with more beads…………………………………so another 3 hours later and all the beads are now in place and the dress is finally finished.

After all the trials and changes of heart about this dress it just goes to show that sometimes what you envisioned does not always work out and you have to be prepared to make changes as you go along!! But I have to say that I am now rather pleased with the end result.